PEX Tools and Tubing Installation Practices
Cross-linked polyethylene (PEX) has become a standard material for residential and light commercial plumbing, hydronic heating, and radiant floor systems. It’s flexible, resistant to scale and corrosion, and faster to install than rigid copper or CPVC. But PEX is not a single “universal” system. The connection method you choose determines the fittings, rings, and tools you must use, and the way you route and support the tubing determines whether the job stays quiet and leak-free or turns into a call-back. This article explains the main PEX tool systems used in the United States and the installation practices that produce reliable results.
PEX Types and Why They Matter Before Choosing Tools
PEX tubing is sold in several types, most commonly PEX-A, PEX-B, and PEX-C. These letters describe how the tubing is cross-linked during manufacturing. They don’t mean one type is “good” and another is “bad,” but they do affect flexibility and which tool systems work best. PEX-A is the most flexible and has strong shape memory, so it expands and recovers easily. Because of that, it’s the normal choice for cold-expansion systems. PEX-B is slightly stiffer and is widely used with crimp and clamp connections. Many PEX-B products also do well in chlorinated municipal water. PEX-C is typically the least flexible of the three but still performs well in typical plumbing layouts using crimp or clamp connections.
All PEX used for potable water must meet the relevant ASTM and NSF standards and be approved under your local plumbing code. Codes can differ on details such as how PEX is supported, whether it can be buried directly, and what kind of sleeve or nail-plate protection is required in walls. If you’re a DIYer, check local amendments before buying tools. If you’re a pro, keep the manufacturer instructions on hand, because inspectors often reference those instructions if any question comes up at rough-in.
Understanding the Main PEX Connection Systems
PEX connections are mechanical rather than soldered. In practice, the big three systems are clamp (also called cinch), crimp, and cold-expansion. Press-style PEX systems are also common among professionals. Every system is built around its own fittings and rings, and mixing components across systems is one of the fastest ways to create leaks. A clean cut and correct ring placement matter more with PEX than many people expect, because the tubing and fittings rely on uniform compression for a fully sealed joint.
PEX Clamp (Cinch) Standard
The clamp system is one of the simplest and most popular methods for repairs, remodels, and smaller jobs. It uses a stainless-steel clamp ring that tightens around the tubing and barbed fitting with a single pinch action. The tool is compact, and many manufacturers offer a clamp tool that works across multiple tubing sizes, which keeps costs down for occasional users and service vans.
To make a clamp connection, you cut the tubing square, slide the stainless clamp ring onto the tubing, and fully seat a compatible barbed fitting. The ring is positioned slightly back from the end of the tubing, typically around an eighth to a quarter inch, centered over the fitting barbs. You then cinch the ring with the clamp tool until the tool completes its cycle and fully compresses the ear on the ring. A correct cinch leaves a tight, even band and a fully flattened ear.
Clamp connections are easy to learn and quick to install. Rings are corrosion-resistant and visually inspectable, and parts are inexpensive and widely available. The main downside is that tool quality varies. Cheap clamp tools can under-cinch, especially after some use. In tight spaces, you must get the tool square to the ring; if you clamp from an awkward angle, the ear may not close evenly. When a ring has to be removed, it must be cut off and replaced, which is normal but adds a step during repairs.
Clamp is a solid choice for DIYers, landlords, and small shops who want a system that is economical, compact, and hard to mess up. Pros in some regions also favor it for whole-house repipes because it’s fast and doesn’t require the same calibration checks as crimp tools.
PEX Crimping Standard
The crimp system uses a soft copper crimp ring that is compressed uniformly around a barbed fitting using a calibrated crimp tool. This method has been used for decades in North America and is accepted virtually everywhere. Its popularity means rings and fittings are easy to find even in small hardware stores, which helps during emergency repairs.
A proper crimp connection starts with a clean, square cut. You slide a copper ring over the tubing, insert the fitting until it bottoms out, then position the ring slightly back from the tube end. The crimp tool is applied at a right angle to the tubing and compressed until it completes its cycle. After crimping, a Go/No-Go gauge is used to verify that the ring has been compressed to the correct diameter. If the ring fails the gauge check, the joint should be cut out and redone instead of “hoping it seals.” That gauge step is non-negotiable in quality work, and it’s the reason crimp systems remain so dependable.
Crimp tools can be purchased in several sizes. Some are fixed 1/2-inch and 3/4-inch tools for the most common residential lines. Others use interchangeable heads to cover more sizes. A good crimper lasts for years, but like any calibrated tool, it can drift. Periodic checks and adjustments keep crimps consistent. The tradeoff compared to clamp systems is that crimping adds steps: separate rings, size-specific jaws, and gauge verification. The tool can also be bulky in certain tight spaces, though slim-profile tools help.
When a crimp joint needs to be removed, a de-crimping tool cuts the copper ring. Many designs work by slicing through the ring without damaging the fitting, allowing fittings to be reused if they’re still in good shape. After removing a ring, trim the tubing back to undamaged material before installing a new ring. Crimp systems are a great fit for whole-home repipes, new construction, and any job where you want consistent results that inspectors instantly recognize.
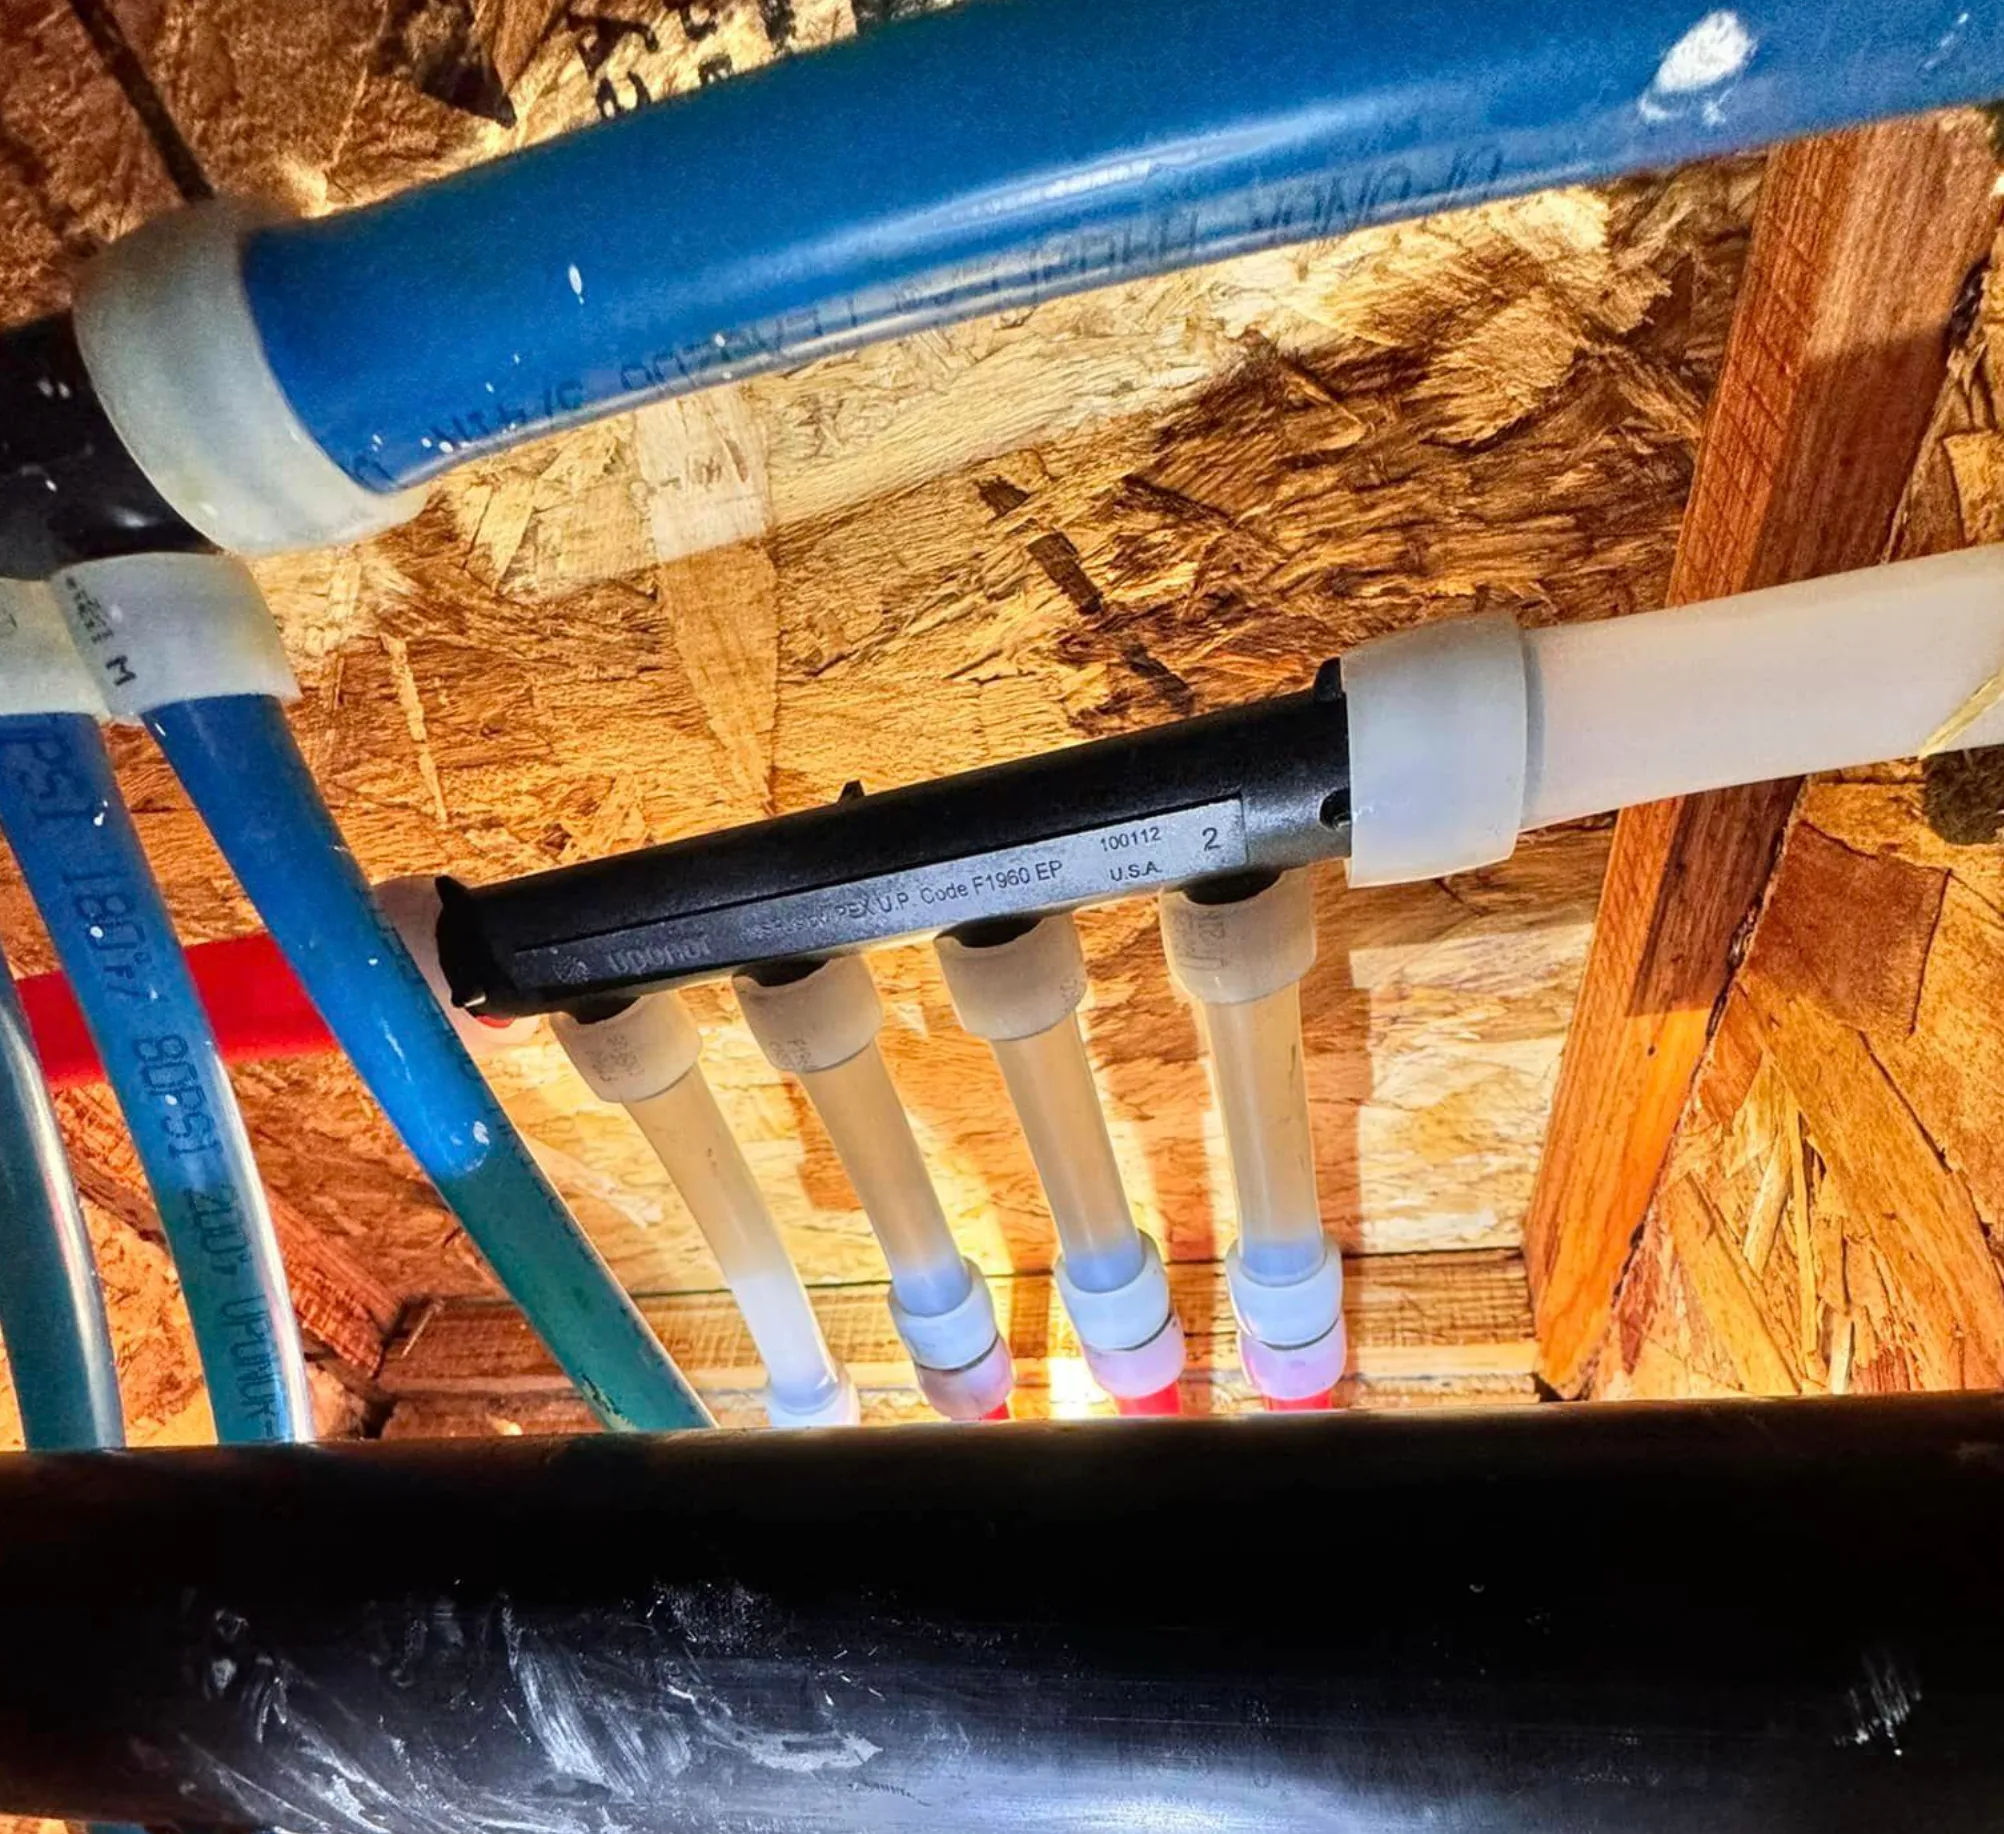
Cold-Expansion Systems (Expander Tools)
Cold-expansion systems are common on professional crews and in high-end repipes. They use a specialized expander tool to enlarge PEX-A tubing and an expansion ring. After a fitting is inserted, the tubing’s memory causes it to shrink back down tightly around the fitting. Because PEX-A expands and returns reliably, it is the primary tubing type used for this method.
The workflow is straightforward but slightly different than crimp or clamp. You slide the expansion ring onto the tubing, insert the expander head into the tube, and expand in several cycles. Each expansion slightly enlarges the tube and ring. After the final expansion, you quickly insert the fitting to full depth and hold it briefly while the tubing begins to recover. In cold weather, recovery is slower, so holding a few extra seconds helps ensure the fitting remains fully seated as the tube tightens.
Once recovered, expansion joints are extremely strong and have excellent long-term performance. They also provide full-bore flow through fittings, meaning less restriction compared to many crimp or clamp fittings. This is one reason expansion systems are popular in hydronic manifolds and radiant heating. The downside is higher tool cost, especially for battery or hydraulic expanders, and the need to use rings and fittings specific to that system. For crews already invested in the tooling, expansion is often the fastest and most durable approach available.
Press-Style PEX Systems
Press-style PEX connections use a powered press tool that compresses a stainless sleeve or fitting over the tubing. These systems are primarily aimed at professional installers because battery press tools and jaws are expensive. On large jobs, however, press systems can cut labor dramatically and deliver very consistent results. Some systems are also designed to press on wet lines, which can be valuable during emergency service.
Press systems are brand-specific, so inventory control matters. If a crew runs multiple brands, sleeves and fittings should be clearly separated to avoid mix-ups. For shops that already own press tools for copper or stainless, adding PEX press jaws can be an efficient way to unify tooling across materials.
Cutting and Prep Tools You Should Not Cheap Out On
Regardless of connection type, your prep tools control leak risk. A poor cut or an ovalized tube end can ruin a joint even if your ring is perfectly installed. Use a sharp PEX cutter designed for plastic tubing. Utility knives and saws tend to leave angled cuts or burrs that interfere with ring compression or seating depth. A dull cutter will crush tubing instead of slicing it cleanly, which creates a subtle leak risk. Replace blades when they start to deform the pipe.
Most PEX systems do not require deburring PEX ends, but you should deburr copper or metal pipe before using transition fittings. A sharp edge on copper can shave PEX or damage O-rings in hybrid fittings. Measuring and marking also matter more than many installers think. A simple depth mark on the tubing helps confirm full seating after a crimp, cinch, or expansion joint is made, especially when the connection will be hidden behind a wall.
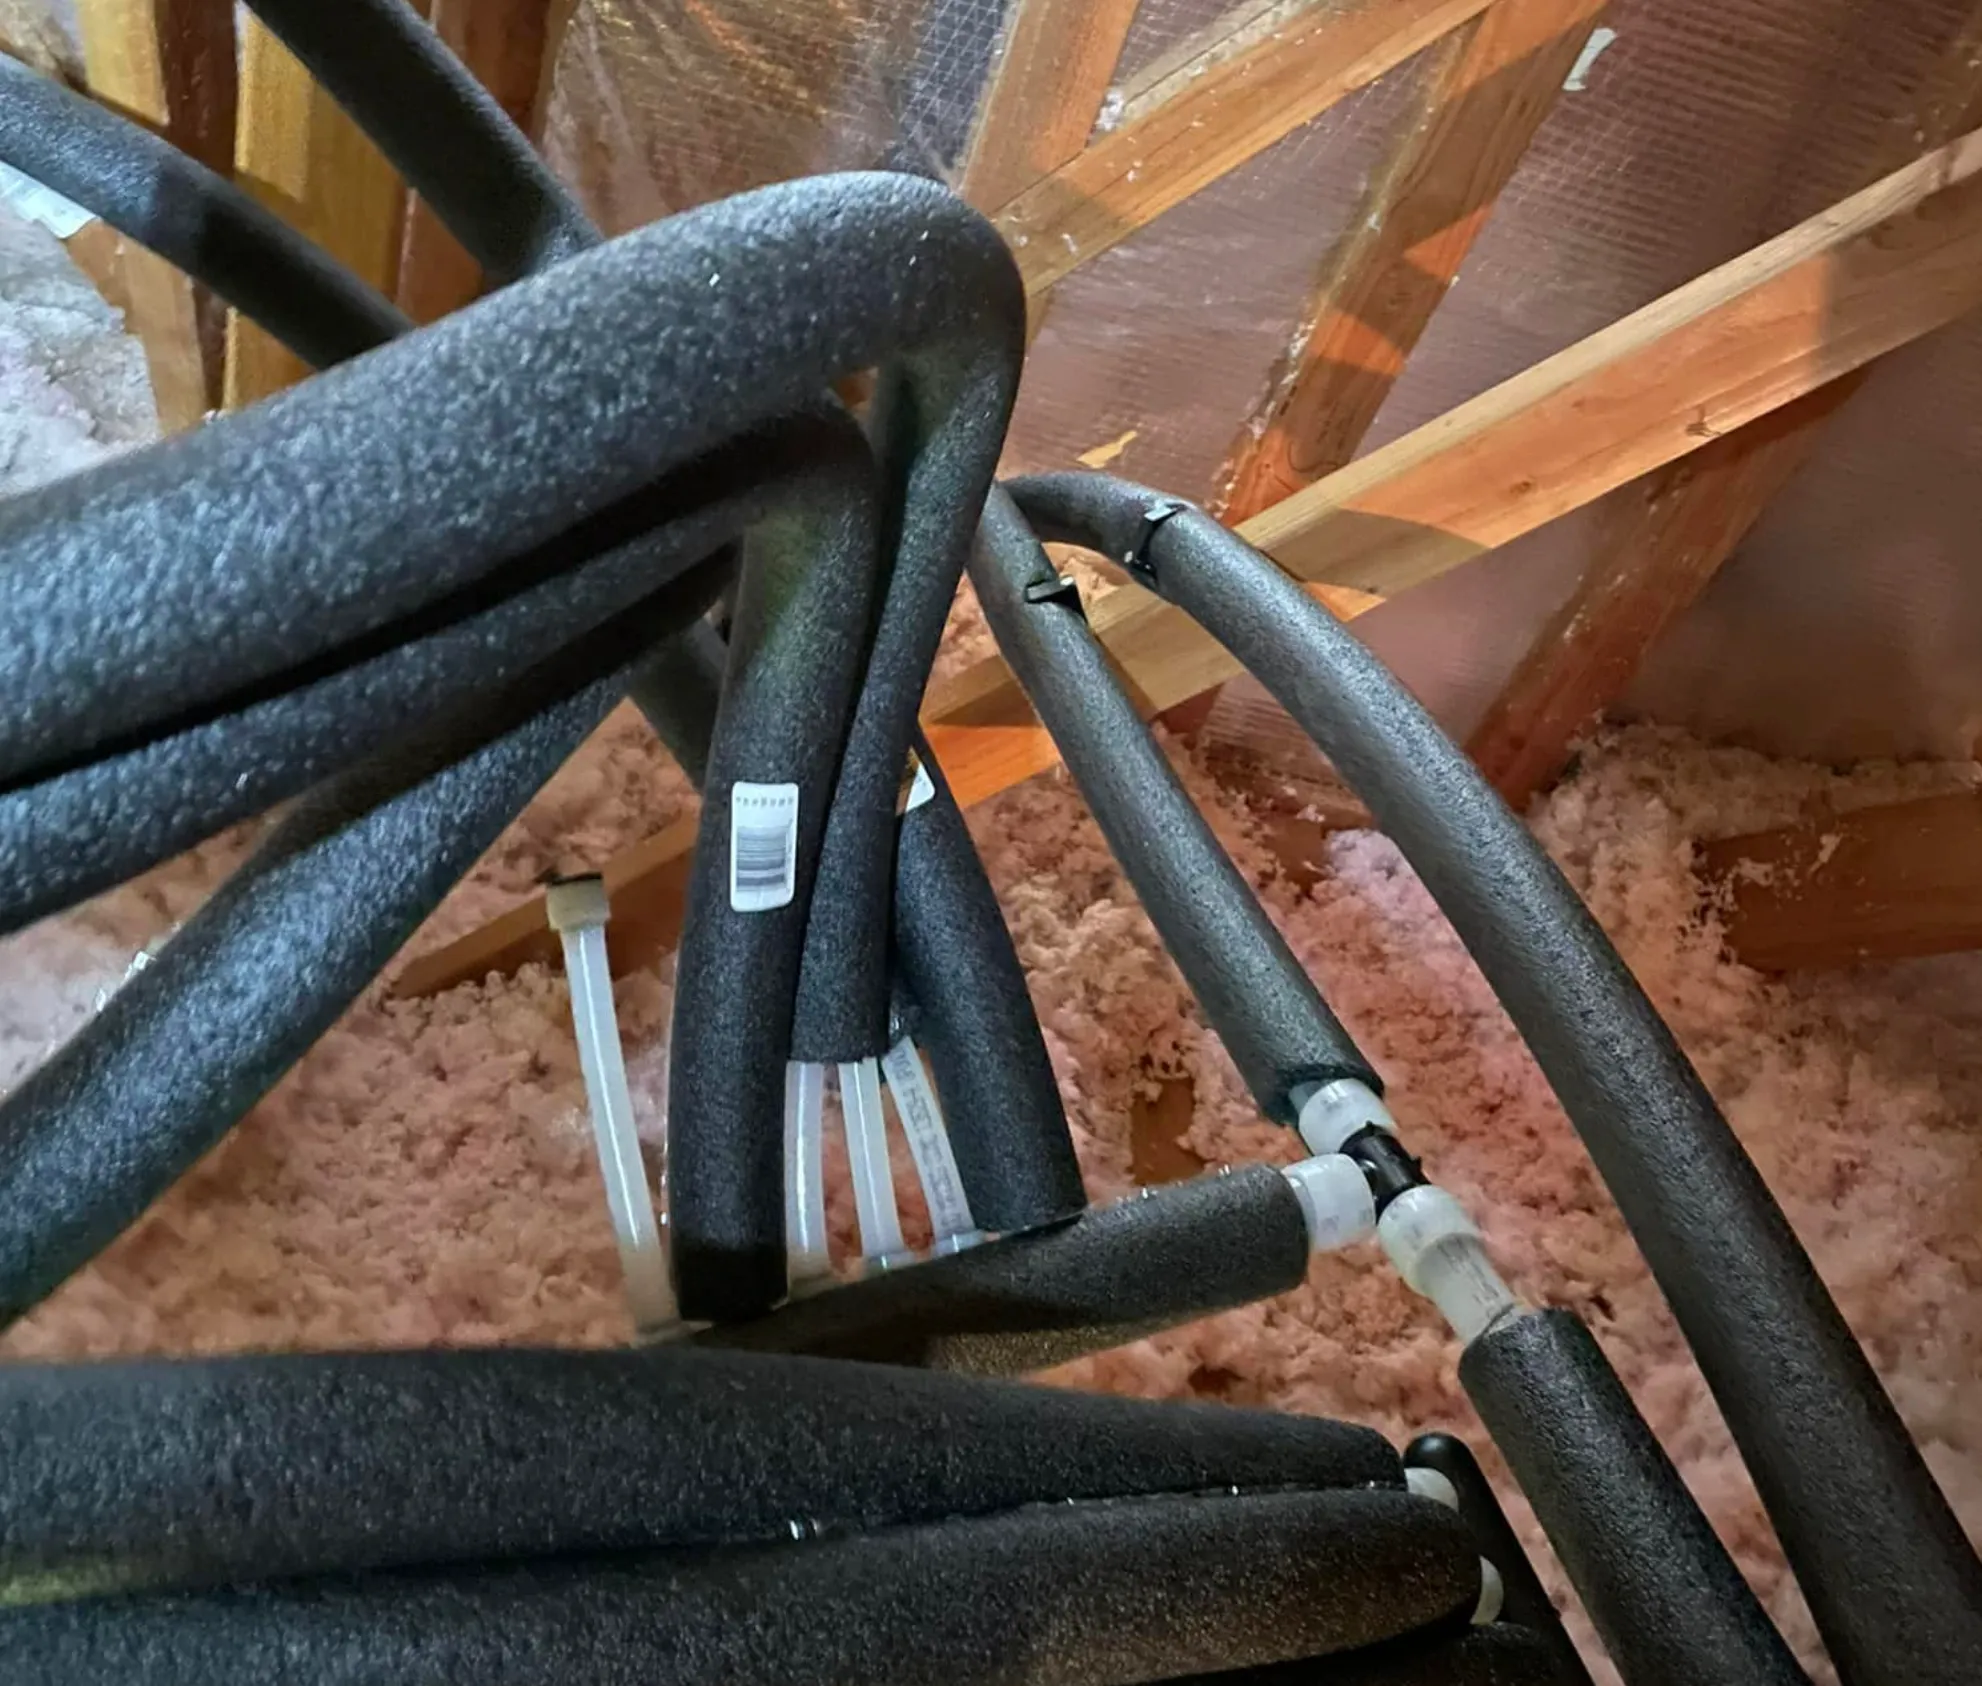
PEX Attachment Tools and Support
PEX routing looks easy because the tubing bends, but neat support is what keeps it quiet and protects it from abrasion. PEX-to-wood attachment tools include manual and pneumatic clip guns that shoot plastic clips around tubing. These clips hold tubing to subfloors, walls, or framing and are common in plumbing and radiant heat installations. Used correctly, they keep runs straight, prevent sagging, and reduce vibration noise.
Foam staplers are designed for radiant floor systems installed on foam board insulation. They shoot plastic staples that bite into polystyrene, styrofoam, polyurethane, or similar boards. Foam staples are compatible with smaller PEX sizes, often from 3/8-inch up to 5/8-inch. Because they’re plastic, they don’t corrode in concrete pours and they avoid creating thermal bridges.
PEX-to-wire mesh tools tie tubing quickly to welded wire in slab or over-pour radiant heating. They reduce labor on large floors and help keep tube spacing consistent. Use ties and fasteners rated for concrete contact, and avoid sharp metal edges that can abrade tubing during a pour.
Support spacing should follow code and manufacturer guidance, but a practical rule is to support 1/2-inch PEX about every 32 inches horizontally and every 4 to 5 feet vertically. Add support near valves, stub-outs, and direction changes. Supports should prevent excessive sagging while still allowing the tubing to move slightly with temperature changes. Where bends are tight, install bend supports or long-turn elbows to avoid kinks and to protect the curve from pinching behind drywall.
Plumbing Layout Options With PEX
PEX flexibility allows you to design plumbing layouts that are difficult or expensive with rigid pipe. The system type you choose impacts material cost, flow consistency, hot-water wait times, and serviceability. The three most common layouts are Trunk-and-Branch, Home-Run with a central manifold, and Remote Manifold systems.
Trunk-and-Branch Systems
Trunk-and-Branch systems resemble traditional copper distribution. A main cold trunk and main hot trunk run through the building, and smaller branch lines tee off to supply fixture groups. Because the trunks carry the combined demand, they are typically larger in diameter than branches.
The main advantage of Trunk-and-Branch is lower tubing footage and fewer manifold components. It also feels familiar to anyone trained on copper plumbing, and it retrofits easily into existing routes. The tradeoff is that the system uses more tees hidden in walls or ceilings. Every tee is a potential leak point, and branches sharing a trunk can experience pressure swings if multiple fixtures run at once. Hot-water delivery can also be slower if the trunks are oversized, because more volume has to be purged before hot water arrives.
Home-Run (Central Manifold) Systems
Home-Run systems feed each fixture with its own dedicated hot and cold line that runs unbroken from a central manifold. There are no tees inside walls between the manifold and the fixture. The manifold is typically installed near the water heater or mechanical room.
The big advantage is stability. Each fixture gets predictable pressure even when several fixtures run simultaneously. Service is simpler too, because a shutoff at the manifold can isolate a single fixture without turning off the whole house. Home-Run layouts also reduce the number of hidden connections, which lowers leak risk. The tradeoff is increased tubing use and a more complex rough-in plan. You need to route many lines neatly through framing, and manifolds add cost. Still, in larger homes or remodels where access is open, Home-Run systems are often the cleanest and most future-proof option.
Remote Manifold Systems
A Remote Manifold system is a hybrid. You run larger hot and cold lines to an area that serves several fixtures, such as a bathroom chase, then install a small manifold to distribute to nearby fixtures. This reduces the number of long individual runs compared to a full Home-Run layout while still lowering tee count compared to Trunk-and-Branch.
Remote manifolds can shorten hot-water wait times and improve pressure consistency for grouped fixtures. They do require more planning than a simple trunk system, and they still place a few connections in concealed spaces, so accessibility should be considered during design. When installed in an accessible cabinet or chase, remote manifolds provide a good compromise between material cost and performance.
Installation Practices That Make PEX Last
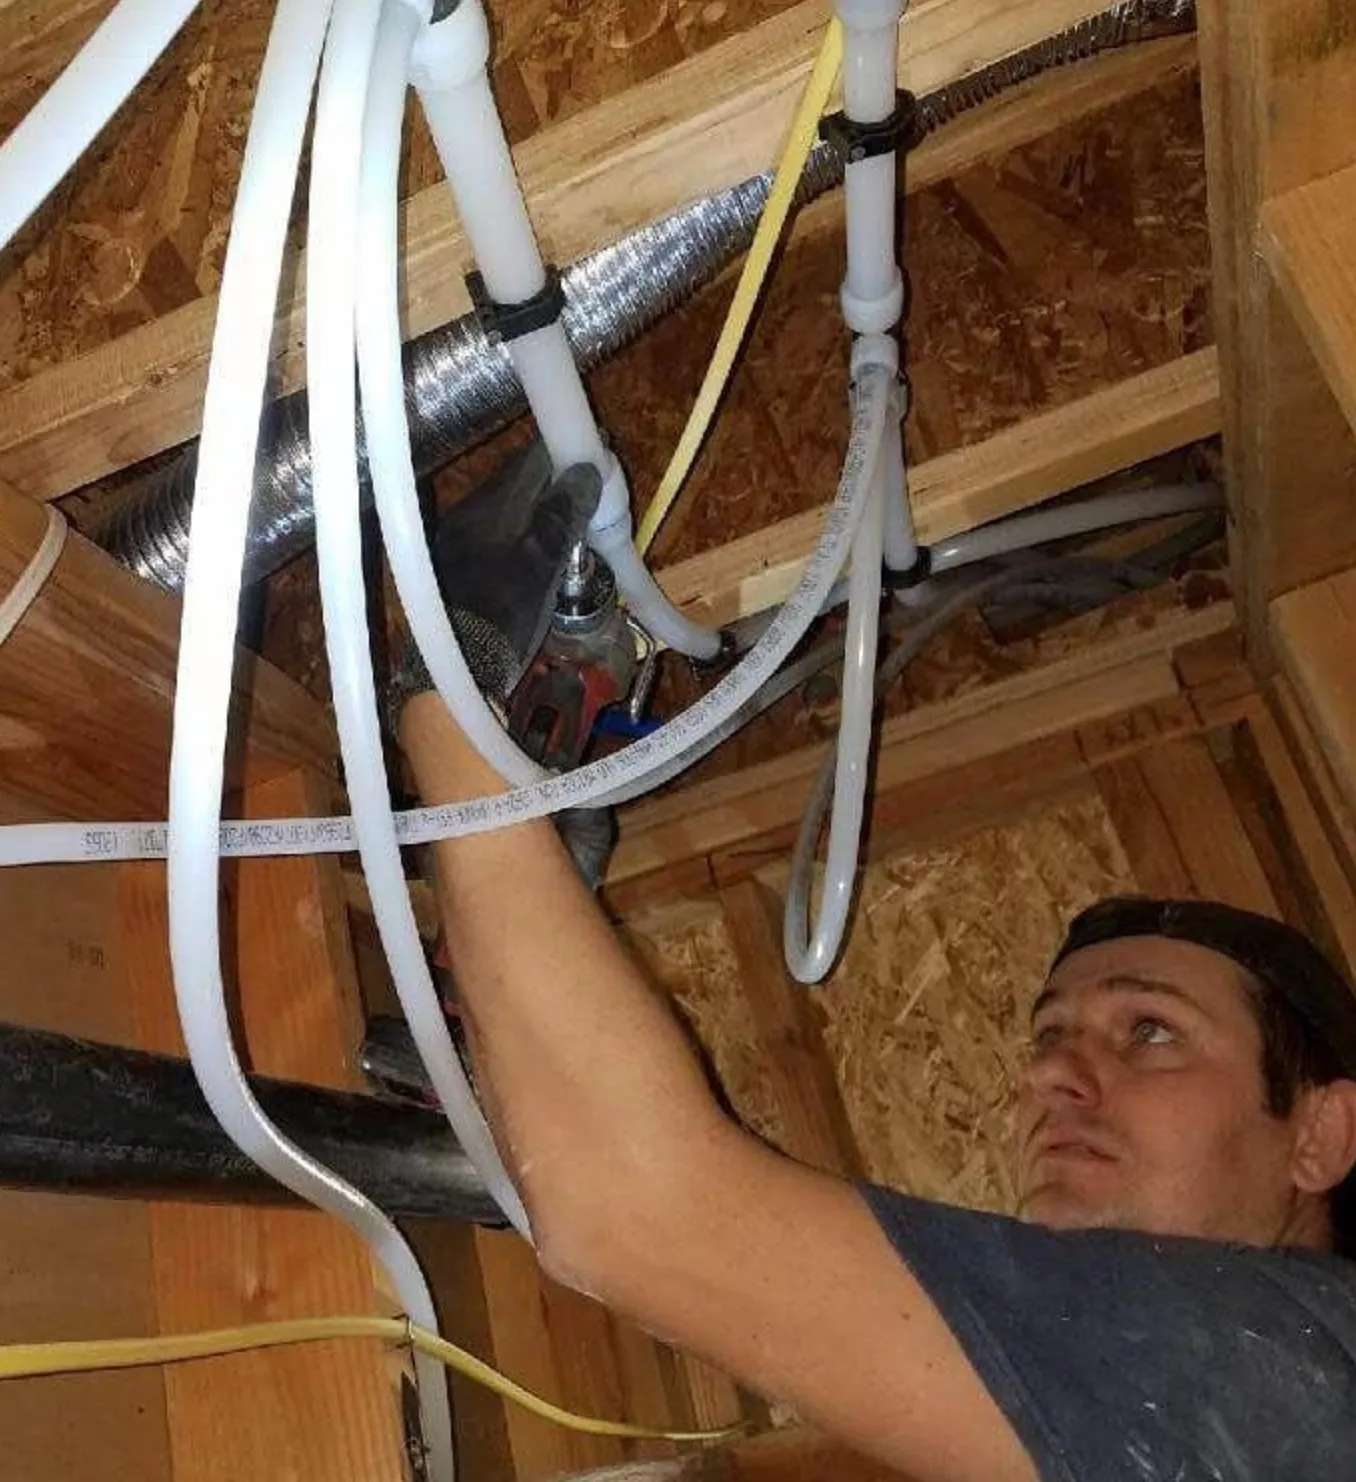
Good PEX work is less about speed and more about discipline. Most failures trace back to a few avoidable habits. Start with the way you route the pipe. PEX expands and contracts more than copper, especially on hot lines. If you pull it tight between fasteners, it will move against framing as temperatures change, creating ticking sounds and eventually wearing the pipe. Instead, allow a slight droop between supports. On long straight runs, build in an expansion loop or offset. The loop gives the tubing room to move and also provides extra slack if you ever need to adjust a route in the future.
When PEX passes through studs, joists, or plates, drill holes large enough to allow sliding. Movement is normal, and tight holes create friction and noise. If the hole edge is rough or sharp, add plastic sleeves or grommets. In metal studs, sleeves are mandatory because metal edges can cut tubing over time. If a brand provides specific sleeve products, use them; inspectors like seeing listed components in vulnerable spots.
Support choice matters as much as spacing. Plastic hangers and straps are ideal because they don’t bite into the tubing. Metal supports can be used only if they are designed for plastic pipe and do not pinch it. Any concentrated stress point becomes a risk during thermal cycling. At sharp turns, use bend supports or long-turn elbows. That keeps the bend radius within specification and prevents kinks behind walls, especially at shower valves and toilet supplies.
Respect minimum bend radius. PEX can bend far tighter than copper, but every manufacturer specifies a minimum radius to avoid restricting flow and stressing the pipe wall. If you need to turn tighter than that radius, use a manufactured elbow or a bend support. A bend that looks fine today can become a weak point after years of expansion and contraction.
If tubing is installed in walls, floors, or ceilings, keep it away from the nailing zone. Use nail plates wherever tubing passes near the face of studs or plates. These plates cost almost nothing compared to a leak repair, so don’t skip them. In unfinished basements, crawlspaces, or garages, protect exposed tubing from physical damage and UV light. PEX is not rated for long-term sun exposure, and even indoor sunlight through windows can degrade it over time.
For buried or trenched runs, prepare a friendly bed. Remove rocks, sharp debris, and voids that could create point loads. A smooth, compacted bottom protects the tubing from abrasion and crushing. After placing tubing, backfill gently and avoid running heavy equipment directly over a shallow run unless it’s properly sleeved and protected per code.
Transitions to copper or other materials should be done with listed fittings. When sweating a copper-to-PEX adapter, solder the copper side first and allow it to cool completely before connecting PEX. Heat conducted into the plastic can weaken it permanently. If you’re using threaded transitions, use appropriate thread sealant and avoid over-tightening, which can crack fittings. Keep dissimilar metals in mind and avoid galvanic corrosion by using proper transition materials, especially on mixed brass and copper assemblies.
Pressure Testing and Commissioning
After rough-in and before closing walls, pressure test the system according to code and manufacturer instructions. Many residential jurisdictions require a water test or an air test around 100 psi for 15 to 30 minutes, but local standards vary, so follow your inspector’s rules. The objective is to catch a missed crimp, a ring placed too close to the end, a nicked tube, or an under-expanded joint while everything is still visible. A slow drop in pressure usually means a small seating error somewhere, and finding it now is far cheaper than finding it after drywall.
Once pressure testing passes, flush the lines thoroughly to remove plastic shavings or debris. On potable systems, disinfect per local code if required. On hydronic systems, purge air completely and confirm flow at the manifold. These final steps prevent noise, poor fixture performance, and complaint-driven call-backs.
Sizing, Hot-Water Delivery, and Efficiency
PEX has a smaller inside diameter than copper of the same nominal size, and that affects sizing. Don’t assume yesterday’s copper sizes automatically translate. Use manufacturer sizing charts, especially on main trunks. Improper sizing can cause noisy flow, slow fixture fill, or low pressure during simultaneous use.
Hot-water delivery is heavily influenced by layout. Long trunk runs store more water volume, which increases wait time and wasted water. If hot-water waits are a concern, a remote manifold near a bathroom group or a true Home-Run layout can improve performance. Insulating hot lines helps too, especially in crawlspaces, attics, or exterior walls. Insulation reduces heat loss, cuts wait time, and improves energy efficiency.
Freeze Reality Check
PEX tolerates freezing better than copper because it can expand slightly, but it is not freeze-proof. Fittings, valves, and transitions do not expand the way tubing does, and they are often the first parts to fail in a freeze. Treat PEX like any other water line: keep it in conditioned space where possible, insulate where it can get cold, and heat-trace if code and conditions require it.
Connection Quality Control
PEX success is mostly about avoiding small mistakes. A quick quality routine catches almost all failures. Confirm that every fitting is fully seated to its shoulder. If you marked insertion depth, verify that the mark is still aligned at the tube edge after crimping or clamping. Check ring placement: rings should sit centered over barbs, not at the very end of the tubing. For crimp systems, gauge every crimp with a Go/No-Go tool immediately after making it. If it does not pass, redo it. On clamp systems, ensure the ear is fully compressed. On expansion systems, tug lightly on the fitting once recovery begins; there should be no movement.
Common Mistakes and How to Avoid Them
The most common mistake is mixing components across systems. A clamp ring on a fitting designed for copper crimps, or the reverse, produces inconsistent sealing. Keep parts labeled, store rings separately, and train helpers to recognize system differences. Another common error is angled cuts caused by dull cutters. The connection may look good but can fail a pressure test or leak later. Replace blades early. Over-tight fasteners are also a steady source of noise and abrasion. PEX needs room to move; secure it without stretching it. Kinks should never be left in place unless the manufacturer allows a repair method. A kink creates restriction and a stress point. Finally, avoid hiding unnecessary connections. Use manifolds and accessible routing so future service is simple. Good planning now prevents expensive wall openings later.
Choosing a Tool System in the Real World
If you’re doing a one-off repair or small remodel, clamp tools are usually the best balance of cost and simplicity. If you’re repiping a whole home on a tight budget, crimp or clamp will both perform well; local norms and inspector expectations may guide your choice. For radiant floors and hydronic work where flow performance matters, PEX-A with an expansion system is a top-tier option. For high-volume professional new construction, expansion or press systems with powered tools can reduce labor and improve consistency enough to justify their higher initial cost.
Conclusion
PEX is forgiving compared to rigid pipe, but durable results still depend on correct tools and disciplined installation. Choose one connection system and stick to its fittings, rings, and tools. Cut square, seat fittings fully, and verify every crimp. Route tubing with movement, bend radius, and protection in mind. If you do those basics consistently, your PEX work will stay quiet, efficient, and leak-free for decades.
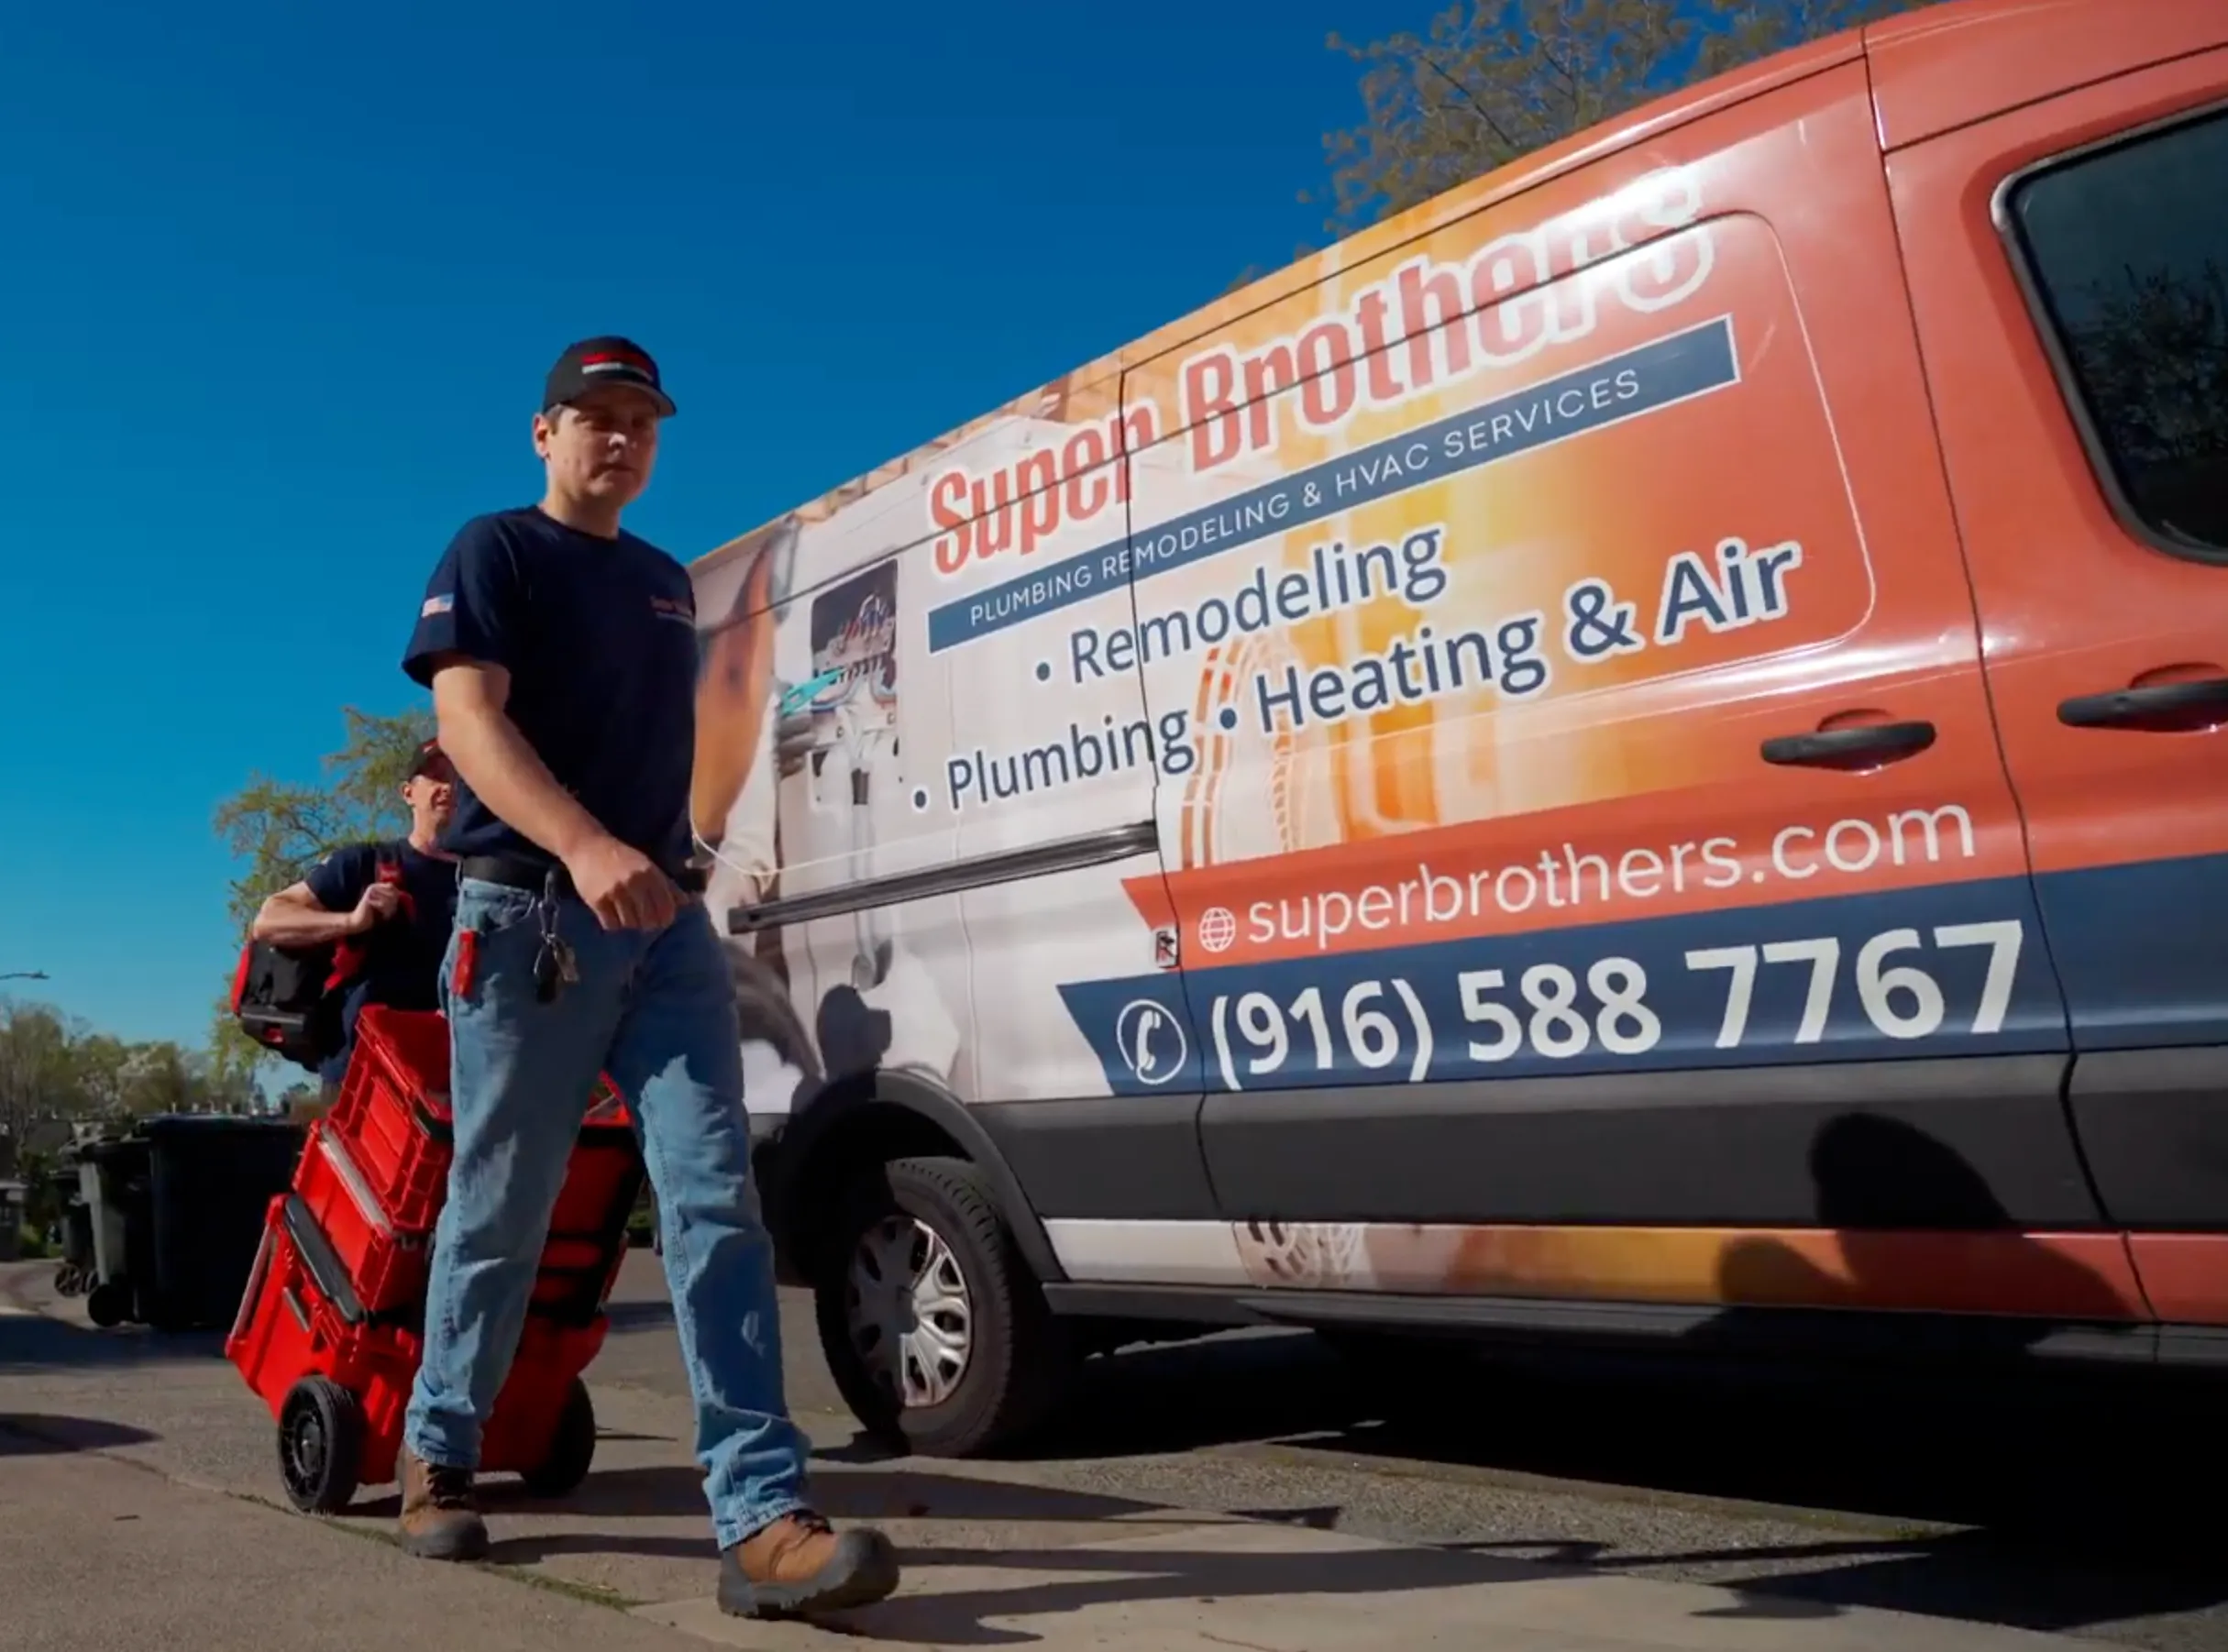
Super Brothers Quality
Choose Super Brothers Plumbing Heating & Air because we use top-tier materials, deliver honest workmanship, and back every job with a real warranty. Our pricing is fair and transparent—no hidden fees, ever.
We pull the permits, build to California code, and pass inspection. Our licensed, highly experienced team handles full plumbing and heating/air replacements and installations, so the job’s done right the first time.
- Top-tier materials
- Honest, quality service
- Workmanship warranty
- Fair, transparent pricing (no hidden fees)
- Permits handled; California code compliant; passes inspection
- Licensed & experienced in plumbing and HVAC installs


Refer Friends, Reap Rewards

Share our expert plumbing services with friends and family. For every successful referral, you earn cash rewards. Refer Now

Ready To Experience Super Brothers Difference! Let’s Start a Conversation!
Financing Options

Super Brothers offers an Installment Payment Plan with 0% Interest for Projects over $1000

Fin tech company that provides payment solutions in the home improvement sector.

Flexible financing for your next home improvement project

Wells Fargo Home Projects Credit Card